Quinoa Stuffed Peppers

For all my food lovers:

I have been in love with this quinoa stuffed bell pepper recipe ever since the first time I had it. Recently, my brother got married, which means I have an amazing new sister! Once at my new sister’s house a while back, her wonderful mama served us these incredible stuffed peppers. They are filled with the healthy grain quinoa that keeps you feeling full but not in a heavy sense. The quinoa has a mixture of sweet potato, corn, and spinach in it also for the perfect blend of complimenting tastes and textures. She topped the stuffed peppers with homemade pesto which set this dish far apart from anything I’ve ever tasted. I’m so excited to share this recipe with you! Here is what you’ll need to make them!

Ingredients for quinoa stuffed peppers:

Four bell peppers, halved and cleaned.
(Sear them on the grill to give them a blackened look).
IMG_7747
For the stuffing:
One teaspoon of olive oil.
One sweet onion chopped.
One large sweet potato chopped.
One cup of cooked quinoa.
One can shoe peg corn, drained and rinsed.
Two handfuls of fresh spinach.
Two cups of vegetable broth (reserve one cup).
One half teaspoon ground black pepper.
One teaspoon of cumin.
Directions:
Heat the oil in a skillet over medium heat.
IMG_7741
Then add in the sweet potato, onion, pepper, cumin and 1 cup of the broth.
IMG_7736 IMG_7740
IMG_7743IMG_7739
Let it simmer together, and cook until potato is soft. This is optional, but I also added a couple dashes of cinnamon here. 
Add quinoa and spinach, cook until spinach wilts.  Add corn … add salt if needed.
IMG_7748
IMG_7742
 
Pour remaining cup of broth in a 9 x 13 casserole and stuff peppers with sweet potato mixture.
IMG_7749
IMG_7750

Bake at 400 for 30 minutes.  While peppers are baking, prepare homemade pesto using your favorite recipe. Once they come out the oven, top the peppers with your pesto. Due to time restraints on my part, I used a store-brought brand of pesto to top the peppers off with that ended up being delicious!

IMG_7751IMG_7755
IMG_7756
I was so happy with how my bell peppers turned out. It had a wonderful blend of tastes that left me feeling full without also feeling gross or guilty. Here are some other stuffed pepper recipes I found from foodie-crush and Betty Crocker. Hope you enjoyed this recipe and amazing dinner, and please share the goodness your stomach just experienced with family and friends.

Candy corn chex mix

For all my people with a sweet tooth:

This recipe is made just for you! As a part of my weekly, treat-yourself Thursday, I decided to have something sweet as my treat for the week. I’ve always loved the various Chex Mix varieties as a kid, but recently a friend of mine gave me a bag of sweet Chex Mix that changed my life. It tasted sweet but also perfectly buttery and delicious. After trying this, I new I had to have this recipe. It’s called candy corn chex mix. Here is what you’ll need to make it happen!

Ingredients:

IMG_7619

One box of Kroger Honey Nut and Bits rice and corn cereal.

One bag of small stick pretzels (optional).

Three cups of pecans (optional).

Your favorite choice of candy (I chose candy corn, but M&Ms would work well also).

One cup of butter.

Two cups of brown sugar.

One half cup of light corn syrup.

If you don’t have corn syrup, look at this substitute that uses sugar and water .

One half teaspoon of vanilla

One half teaspoon of baking soda.

Directions:

Preheat oven to 250 degrees and spray a large cookie sheet with Pam.

Mix cereal, pretzels and pecans in a bowl together. (I didn’t use pecans and pretzels because I don’t like them).

Place the mix into two bowls.

IMG_7620

In a sauce pan mix the brown sugar, butter and corn syrup until boiling.

IMG_7621

Take the pan off of the heat once it boils, and add in the vanilla and baking soda. It will fizz.

IMG_7632

IMG_7636

Pour the goodness over your chex, and mix it together.

IMG_7638

Spread your evenly coated chex unto the greased cookie sheet.

Bake in the oven for one hour. You should stir the mix three times while it bakes.

IMG_7641

Let the mix cool, and add your favorite candy. Then enjoy the awesome mix with good friends!

IMG_7644 IMG_7646

I love the way this mix turned out, and it ended up being a great addition to our study party last night. Here are some other great recipes for chex mix from the Original Chex and the Pioneer Woman. Hope you enjoy, and let me know what type of chex mix is your favorite!

Pineapple-mango- blueberry pick-me-up smoothie

For all my people on the go:

Life moves past us so quickly all the time. It seems like there is barely time to catch a breath in our day, let alone to make time for preparing an amazing, healthy meal each for every time you want to eat. This summer my mom helped me find a great solution to my problem with wanting to eat healthy but not having the time. She gave me some great smoothie recipes that are great for you and literally take three minutes to make (clean-up included). This one below is one of my favorites and came about from experimentation with my favorite fruits. It’s a blueberry-mango-pineapple smoothie. Here is what ingredients you’ll need!

Ingredients:

IMG_7596

1/2 cup of frozen blueberries. (These are cheap at walmart or kroger).

1/4 cup of Trader Joe’s frozen pineapple tidbits.

Approximately seven mango chunks from Trader Joe’s frozen mango chunks.

1 cup approximately of water.

Two packets of pure stevia (optional).

What is great about smoothies is that you can add or take away as much fruit as you want to get the desired taste and vitamins. I was looking to have a tangy, but still sweet recipe.

Directions:

Set out your favorite blender. I suggest the nutri-bullet or magic bullet blenders for great drinks!

IMG_7593

Place 1/2 cup of blueberries into the magic bullet.

IMG_7600

Place 1/4 cup of pineapple tidbits into magic bullet.

IMG_7598IMG_7599

Place desired amount of mango chunks into magic bullet.

IMG_7595IMG_7601

Add water here, and also add stevia here.

IMG_7602 IMG_7603

Now blend.

IMG_7610IMG_7608

Pour into your favorite cup and enjoy!

IMG_7612IMG_7615

Here are some other amazing and creative smoothie recipes I found from Foodnetwork (50 smoothie recipes) and Prevention.com (banana ginger smoothie). I’m curious to see which other recipes my friends are using, so please share! Let me know what smoothie recipes you use during the week! Happy Thursday!

Add these simple veggies to any meal

For all my people who are looking for an easy side dish:

Look no further than this easy recipe! Lately I have been on the hunt for simple side dishes to go along with my staple chicken dinner entrees. I went shopping not to long ago at my favorite grocery store, Trader Joe’s and found a package of frozen, char-grilled vegetables that were ready to be made! The veggies include bell peppers and sautéd onions. The package looks like this:

IMG_7571

The simplicity of these frozen veggies were so quick, and took me six minutes to make on the stove. It is the perfect addition to any meal. Here’s how it works.

Directions:

1. Add 1 teaspoon of olive oil to a pan sprayed with non-stick spray.

IMG_7572

2. Place the stove on medium heat and add desired amount of veggies to pan.

IMG_7573

3. Cook with pan covered for three minutes.

IMG_7577

4. Cook uncovered for 3 minutes and add seasonings.

IMG_7575

Along with the veggies, I decided to whip-up some rice for a quick lunch.

IMG_7582IMG_7580

This lunch turned out awesome! Here are some other easy side dishes I found from Food Network (rice casserole), and from Cooking Light (asparagus with balsamic tomatoes). Enjoy your delicious veggies, and let me know what sides you pair with entrees in your kitchen!

Ham cheddar and rosemary pinwheels

For all my people who enjoy eating:

This is a recipe I’m confident all will love! It is a slightly modified version of a recipe I found from Baked Bree called “ham, cheddar and rosemary pinwheels”. The recipe took me less than 30 minutes to whip out in preparations and baking time! These pinwheels can be an awesome addition to any fall festivities and get-togethers with friends or family.

Here is all you’ll need to make it happen.

Ingredients:

IMG_7345

One fourth cup of dijon mustard.

Two tablespoons of honey.

One half teaspoon of black pepper.

One tablespoon of fresh chopped rosemary.

One and one half cups of sharp cheddar cheese.

Turkey lunch meat (Baked bree’s recipe used ham, but I decided turkey may be leaner).

One frozen puff pasty (thawed as directed from package).

1. In a small bowl, mix the mustard, honey, pepper and rosemary. Set bowl aside. Preheat oven to 375.

IMG_7349IMG_7352IMG_7356

2. Place pastry on a floured surface. Spread a thin layer of mustard onto the pastry.

IMG_7359

3. Place half of cheese onto the pastry. Then add turkey lunch meat as desired.

IMG_7360IMG_7361

4. Add the rest of cheese on the pastry.

5. Roll pastry into a length-wise forming the pinwheel shape.

6. Cut off pinwheels about a half inch thick.

IMG_7362

IMG_7364

7. Bake for 15 minutes in a preheated 375 degree oven until golden brown. You can reheat these in a 350 degree oven for five minutes if needed.

IMG_7365

My pinwheels did not come out as amazing as they could of because I brought the wrong kind of pastry puff. Needless to say, if you are looking for pastry puff, look to Trader Joe’s or Walmart. Here are a couple other pinwheel recipes you may enjoy from Yummly and Cooks.com. Enjoy the awesome taste of these pinwheels on this beautiful fall day and share them with a friend! Let me know how your pinwheels came out!

Fresh oven-baked sweet potato fries

For all my sweet potato lovers:

Fall is in full swing, and my heart is so happy. The leaves are starting to fall here in Nashville, and sweaters with boots are just beginning to make their way out from the back of our closets. Pumpkin spice, cinnamon and sweet potato are just a few of my favorite flavors of fall. In celebration of this wonderful season upon us, I’ve decided that the next recipe I’d share would be a simple autumn favorite of mine, oven-baked sweet potato fries.

This recipe is so easy and delicious. Here are the ingredients you’ll need to make it happen.

Ingredients:

Sweet potatoes! (as many as you want, I would suggest at least one per person).

Olive oil (about three tablespoons or when the fries are lightly coated).

Salt, pepper and seasonings (whichever you desire).

Cinnamon (this is optional, but I thought it added a nice factor of salty and sweet).

Directions:

  1. Wash, peel and cut sweet potatoes. Choose whichever size fry you’d like, just make sure that the fry thickness is pretty consistent. Preheat your oven to 425.

IMG_7321

IMG_7323

2. Place cut potatoes in a bowl or in a plastic bag and add the tablespoons of olive oil.  Add a couple pinches of flour if you’d like for extra crisp! Shake the bag to ensure the fries are evenly coated.

IMG_7324

IMG_7328

3. Place a layer of foil on a cookie sheet and place the potatoes on the cookie sheet.

IMG_7329

4. Bake the fries for 30 minutes. Flip the fries with a spatula after 15 minutes

5. Enjoy fall and your sweet potato fries.

IMG_7332

IMG_7331

Here are some recipes from Paula Dean and Cookie and Kate for some more ideas on this delicious fall-time staple. Enjoy this beautiful fall day, and comment below how your oven fries turned out and any recipe suggestions!

Childhood treat made fresh

For all my people that are healthy eaters:

There comes a point in the week where salad, veggies and fruits just will not do it for you. It is necessary at least once a week to treat yourself to something you love. I’ve been told by medical professionals that it is best to let yourself have a little of what you love. If you do not allow yourself some grace with your diet, there will come a breaking point where you will binge-eat on unhealthy foods. Treat yourself today– the key is with moderation and good judgment!

Today was my treat myself day, and I decided to make a recipe I have been eyeing for a while. It is reminiscent of an old childhood favorite, the Little-Debbie oatmeal cream pies. This recipe from “Baked Bree” brings the old favorite to life without all the scary preservatives found in the snacks. The recipe includes the oatmeal cookies as well as the cream to go in between the cookies.

Here are the ingredients you’ll need!

IMG_7276

Oatmeal Cookies:

  • 1 stick butter, room temperature
  • 3/4 cup brown sugar
  • 1 egg
  • 1 teaspoon vanilla
  • 1 1/4 cups flour
  • 1 1/2 cups oats
  •  1/2 teaspoon baking soda
  • 1/2 teaspoon salt
  • 1 /2 teaspoon cinnamon

Marshmallow Filling:

  • 1 stick butter, room temperature
  • 1 7-ounce container marshmallow creme
  • 3 cups powdered sugar
  • 1 teaspoon vanilla
  • a little less than 1/4 cup flour (this thickens the filling, making it less runny)

Directions:

1. In a bowl mix brown sugar and butter together until creamy with a fluffy-like finish.

IMG_7277 IMG_7280

2. Add eggs and vanilla in with butter and sugar.

IMG_7281

3. Combine flour, baking soda, oats, salt, and cinnamon in one bowl and mix together.

IMG_7282

IMG_7285

IMG_7286

4. Begin then to add the flour combination to the butter mixture. Mix until combined.

IMG_7288

IMG_7291

5. Preheat your oven to 375.

IMG_7269

6. Place tablespoon-sized pieces of dough unto your cookie sheet. Bake for 7-8 minutes.

IMG_7293

7. Let the cookies cool on a cooling rack (if you have one). If you’re poor like me, use a regular plate.

IMG_7308 IMG_7307

8. Put your remaining dough on your cookie sheet, and bake for 7-8 minutes.

Cream filling directions:

1. Make the filling by mixing together the butter and marshmallow cream.

IMG_7294

2. Slowly add the powdered sugar and vanilla. After experimentation, I found that the texture of the cream from this recipe was a little runny. I added a little less than 1/4 cup of flour to the cream mixture, and I found that the cream was thicker and more stable on the cookies. Mix the flour in until smooth and creamy.

IMG_7297 IMG_7295IMG_7296

3. This step is optional, but I also added a couple dashes of cinnamon to tie in the tastes of the cookie and cream together. This is also another optional step, but I placed my cream mixture in my fridge to let it stand and thicken.

IMG_7299

4. Split your cookies into pairs. Place a dollop the cream mixture between your two oatmeal cookies. I decided to place my cream pies in the freezer for a short three minutes to let the cream/cookie mixture solidify together.

5. Grab a plate, serve with milk and enjoy your cream pies!

IMG_7318

Though the final product turned out a little messy in appearances, the taste was so good. The cookies were delicious, and so was the cream, but the cream recipe was not my favorite at first because of the thin nature. Here are some other oatmeal cream pie recipes from Sally’s baking addiction and Carl’s bad cravings that I found. I may try their cream recipe to see if it turns out more consistent! How did your cookies turn out?

Sweet Potato Biscuits

For all my sweet potato lovers:

You should all know as a disclaimer that I am crazy about sweet potatoes. Sweet potato baked, sweet potato fries and sweet potato cupcakes… I love it all! A few weeks ago my sweet roommate made sweet potato biscuits, and they were absolutely incredible! Since the beginning of fall has started, I figured I would try to come up with my own recipe! These biscuits will be a really creative and awesome addition to any meal, and are a delicious way to get your nutrients in. I tried to use everything I had at home and not run out to the store, so this recipe is a combination of the recipe from Southern Food and My-Recipes.com.

Here is my combined recipe:

Ingredients

Ingredients

Dry ingredients:

  • Two cups all-purpose flour (about 9 ounces)
  • 2 teaspoons baking powder
  • 1/2 teaspoon salt
  • 3 tablespoons brown sugar
  • 1/4 teaspoon ground cinnamon

Other ingredients:

  • 1 pureed sweet potato
  • 5 tablespoons chilled unsalted butter, cut into small pieces
  • 1/3 cup fat-free milk

Pre-preparations:

  1. Preheat oven to 400°.
  2. Wash off sweet potato and cook it. I choose to place it in the microwave for four and a half minutes because it is very quick. Once it is finished, peel off the skin of the potato, and mash the potato with a fork or desired instrument.

Directions:

  1.  Lightly spoon flour into dry measuring cups; level with a knife.

Add two cups of flour.

IMG_7171

Add two teaspoons of baking powder.
IMG_7175

Add one fourth teaspoon of cinnamon.

IMG_7173

Add one half teaspoon of salt.

IMG_7172

Add a three tablespoons of brown sugar.

IMG_7178

Stir those ingredients together until it is a lumpy-like mixture. Combine flour,  brown sugar, baking powder, cinnamon and salt in a bowl. Cut in butter with a pastry blender or two knives until mixture resembles coarse meal. (I finger-mixed the dough here).

In another bowl stir the pureed sweet potato and milk together.

IMG_7181

Then add it to the flour mixture.

IMG_7182

Your dough should look something like this.

IMG_7192

2. Turn dough out onto a lightly floured surface; knead lightly five times. Roll dough to a 3/4-inch thickness; cut with a two-inch biscuit cutter into ten biscuits.

Place biscuits on a baking sheet coated with cooking spray.

IMG_7188

Add a little flour to the bottom of the pan .

IMG_7189

Then add dough.

Place the biscuits on prepared baking sheet. Discard any remaining scraps.

IMG_7190

Then place in oven.

IMG_7191

3. Bake at 400° for 15 minutes or until lightly browned. Remove from pan; cool 5 minutes on wire racks. Serve warm or at room temperature.

This is what the finished product of what my biscuits looked like.

IMG_7203IMG_7201

And here’s the happy face of the girl who got to eat a couple biscuits herself! They were absolutely delicious, and I got to enjoy them guilt-free.

IMG_7196

Hope you enjoy your recipe, and thanks again to Southern food and MyRecipes for my combined recipe. How did your biscuits turn out?

Think outside the box of grilled chicken for dinner

For all my grilled-chicken eaters,

As much as we all love this dinner time staple, it is easy for regular grilled chicken to become extremely boring to us. Here is an awesome recipe I love to have around to make an uninteresting round of grilled chicken a little bit more lively. It’s called Parmesan herb-crusted chicken breasts. This easy recipe gives the chicken a good crunch factor while staying well seasoned and healthy.  Anyone can also find this recipe off the side of the Panko bread crumbs box!

Ingredients

Ingredients

Here are the needed ingredients:

4 boneless skinless chicken breast halves
1 pouch Prive Selection Parmesan Herb Panko Bread Crumbs ( four dollars from Kroger!!!!)
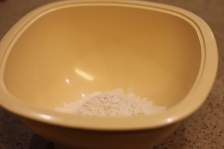
1 cup flour
1 cup milk or water
Fresh cracked black pepper (optional)
4 tbsp olive oil

Makes: 4 servings. Make sure to refrigerate any left overs.

Supplies: 3 bowls, 1 skillet and one oven baking pan. (I used a glass 8×10)

Directions:

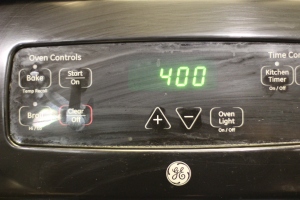
1. Preheat the oven to 400 degrees.

IMG_0240

2. The next step you’ll want to do is grab 3 medium sized bowls. In one, put your cup of flour. In the next bowl, place your cup of milk/water. In the last bowl, open a package of the Panko bread crumbs and pour some in the bowl. I normally pour about half of the pouch because not all of the crumbs get used! So I would say start out with less crumbs in the bowl, and add more as you need. Place your bowls in this order:

IMG_0215IMG_0216IMG_0222

3. Depending on the thickness of your chicken, use a mallet/rolling pin pound the chicken to 1/3-1/2 thickness.

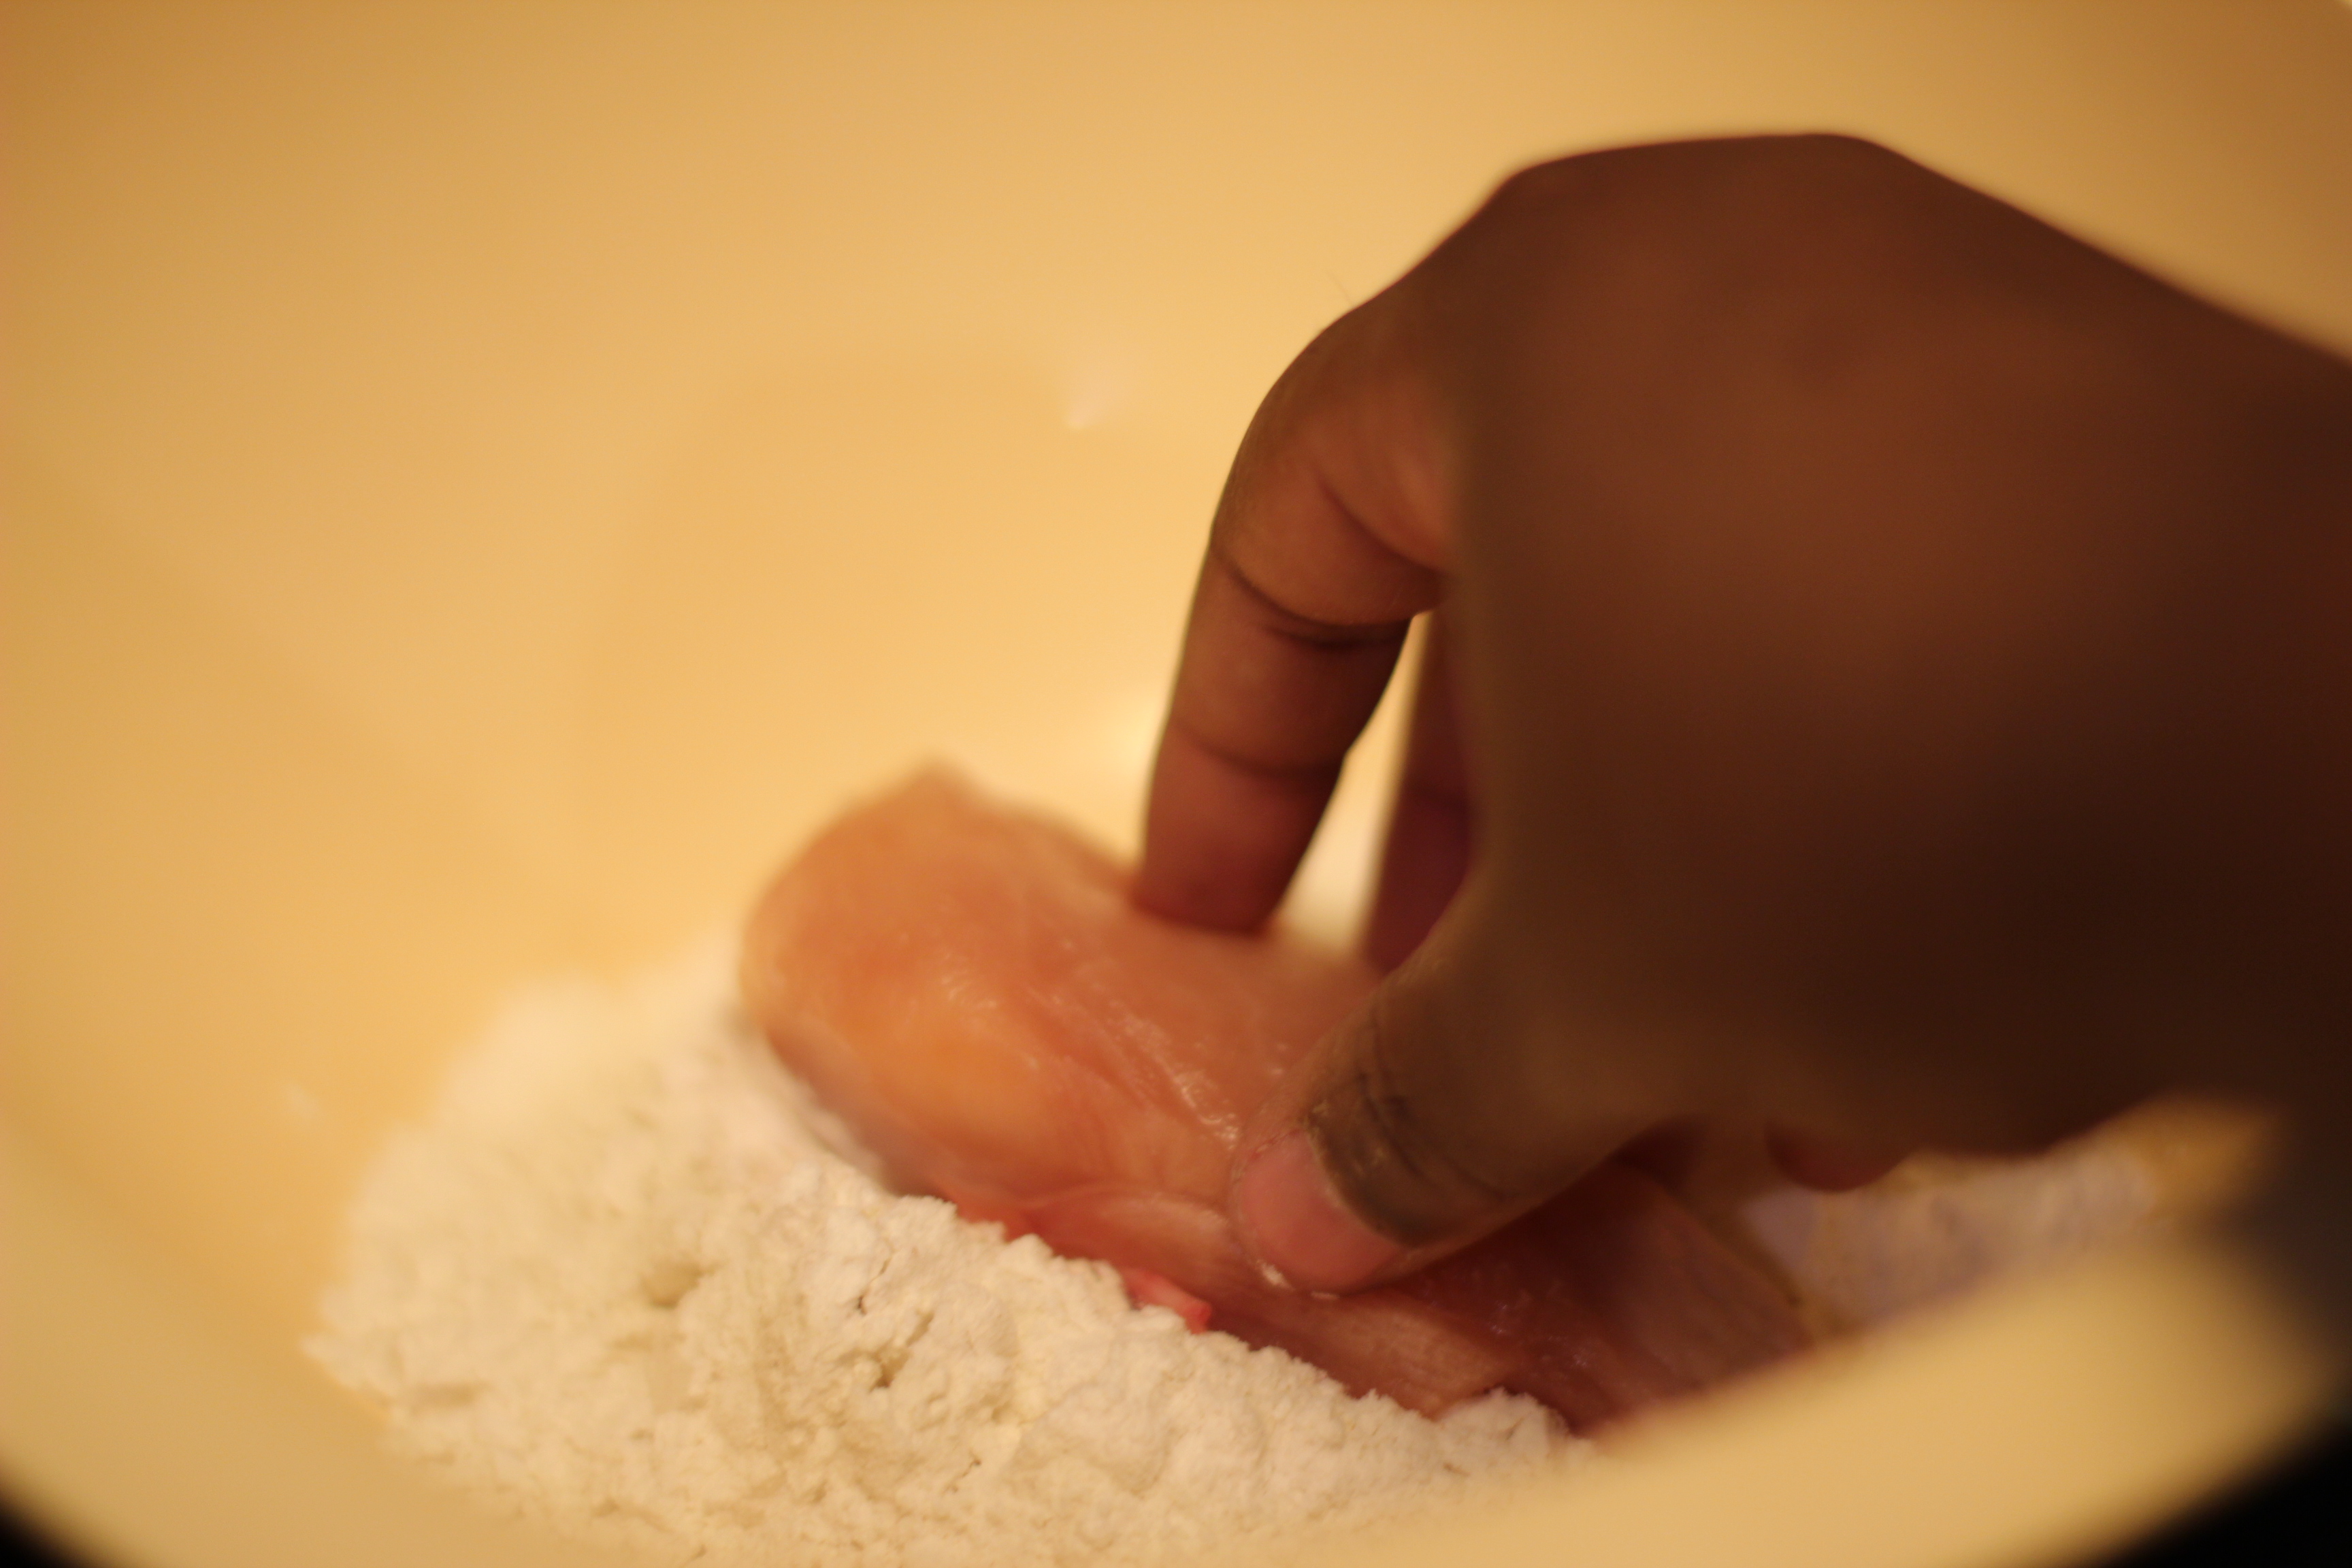
4. Take first chicken breast and dunk it deeply into the flour. Dredge the breast completely.

IMG_0228

IMG_0229

5. Take the floured chicken breast and next dredge it into the bowl with milk or water.

IMG_0231

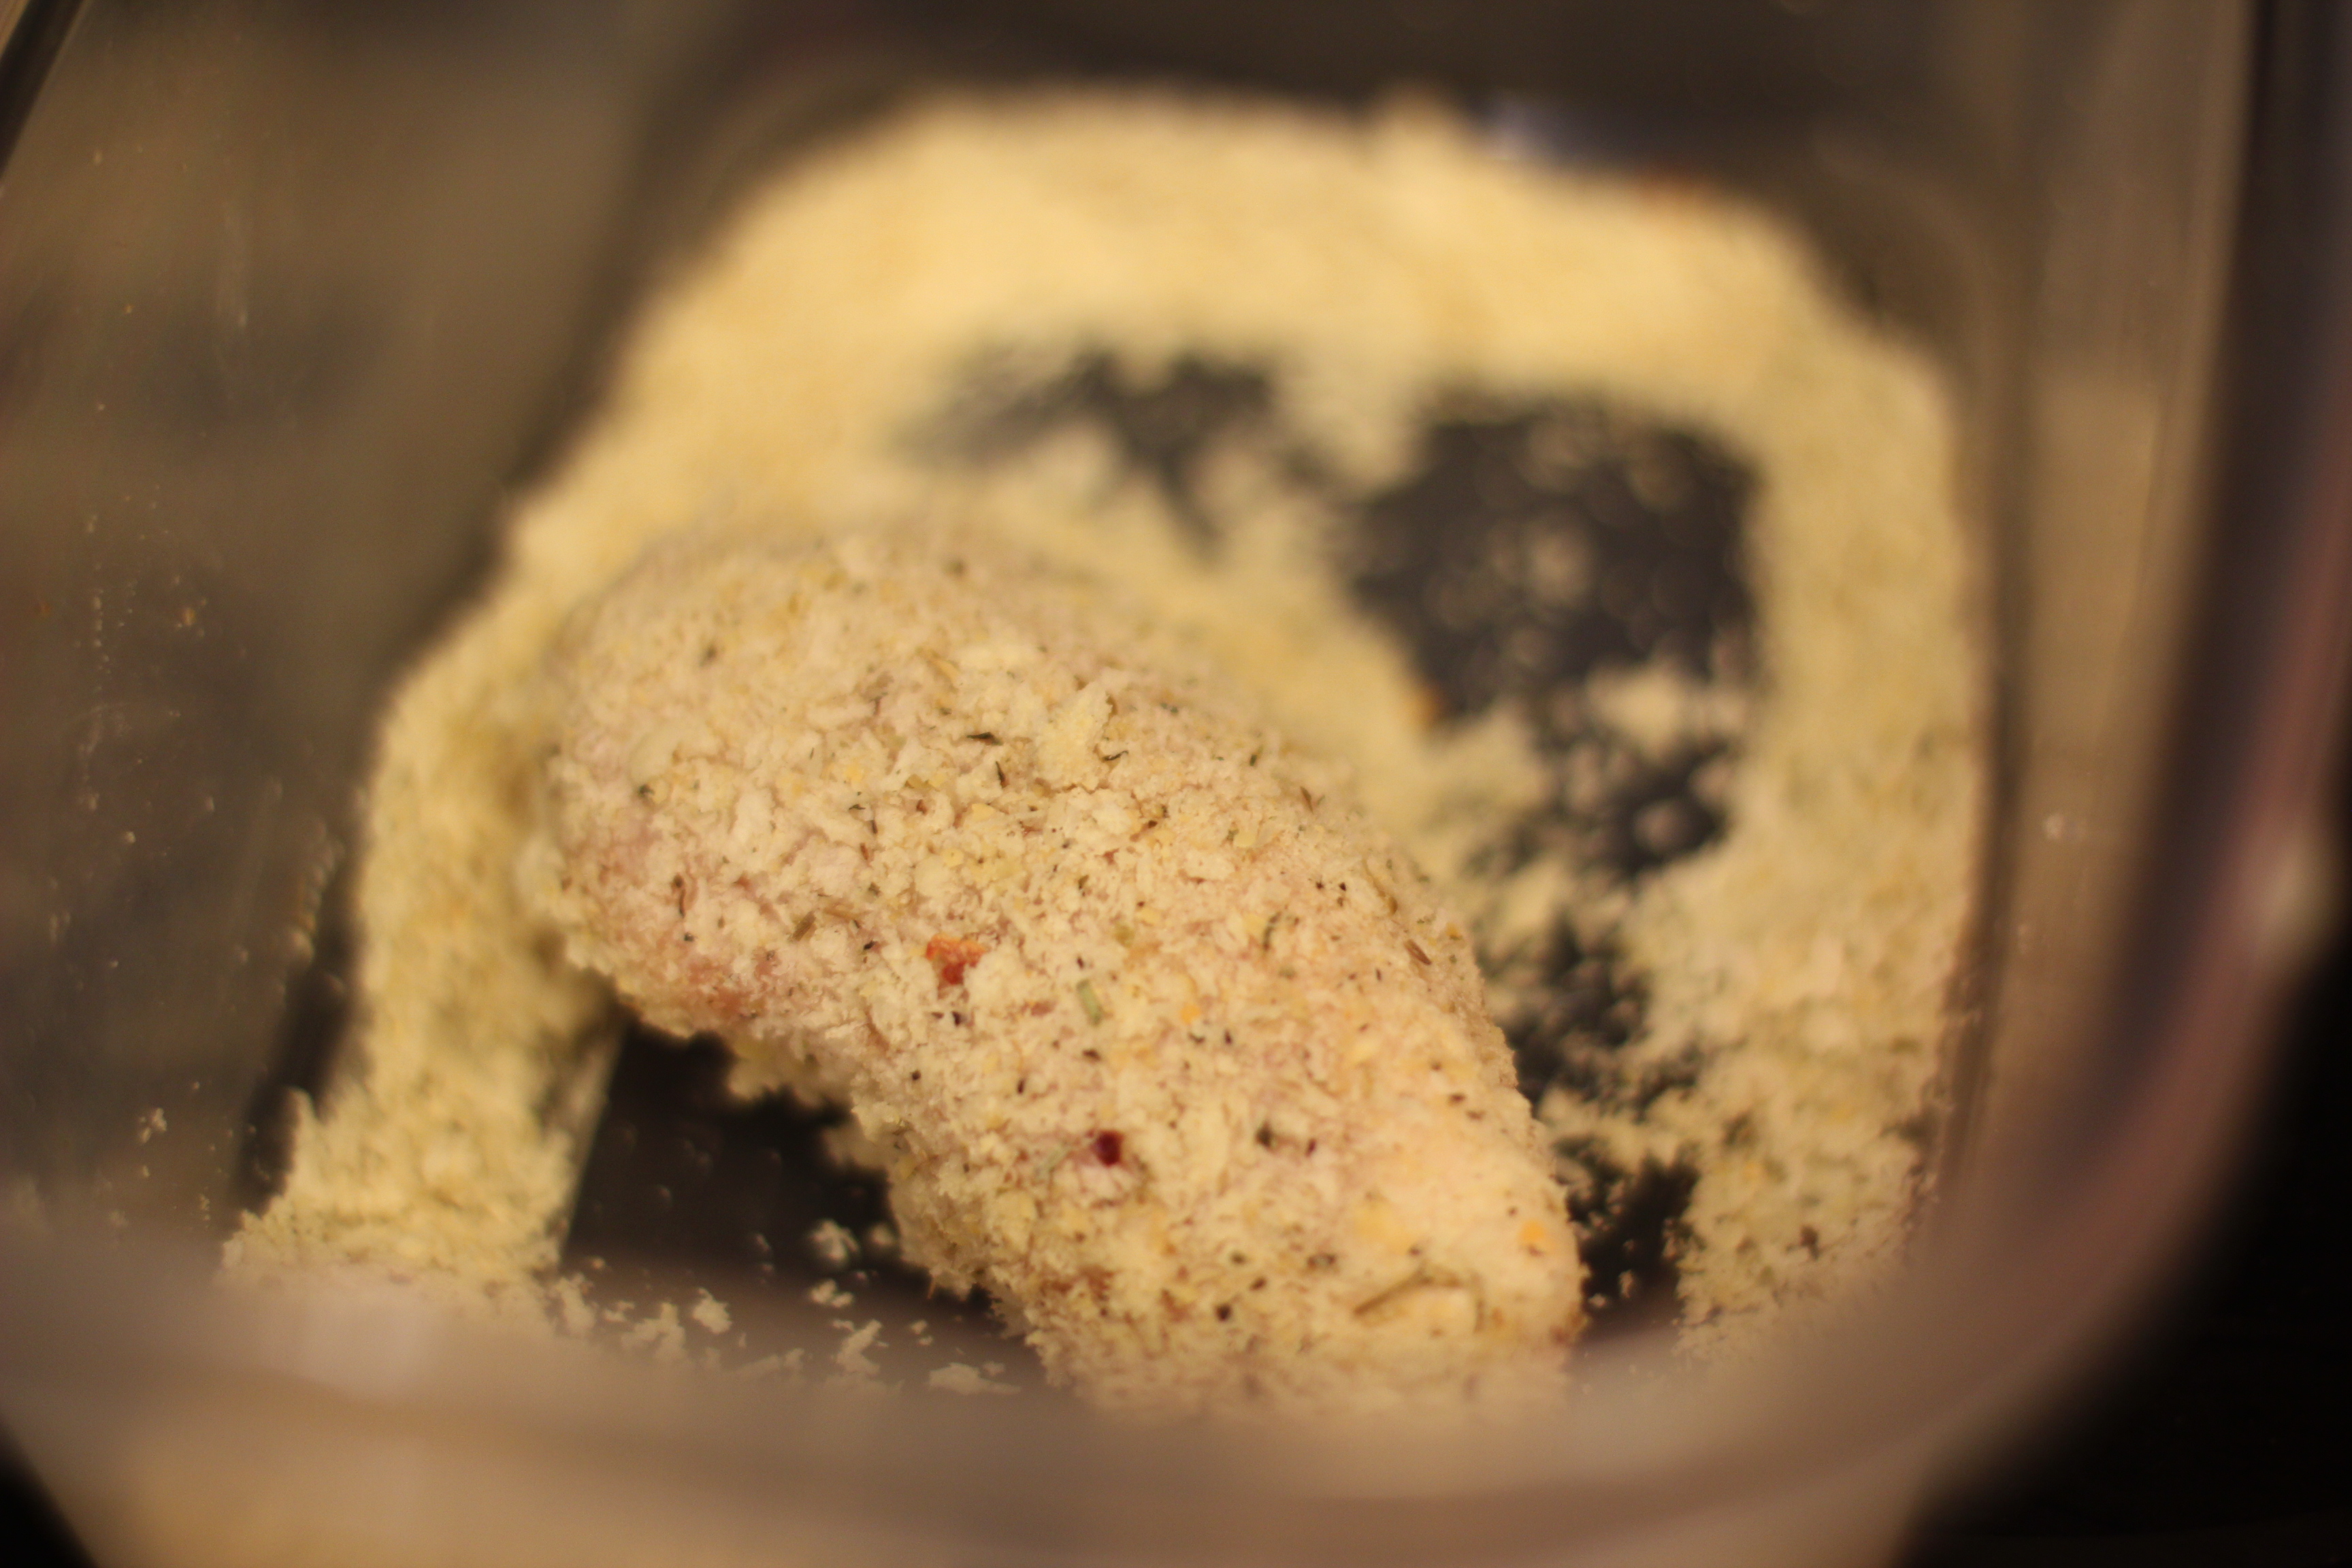
6. Take chicken breast and place it in the bowl with the Panko Crumbs.

IMG_0232 IMG_0233

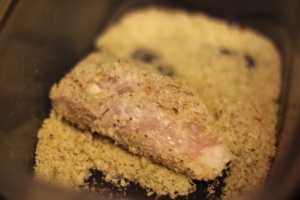
7. Place chicken on a spare plate.

8. Repeat for remaining chicken breast. Discard of any remaining flour, milk/water or crumbs.

9. Lightly spray your skillet with a non-stick spray, then place on medium heat on the stove. Add two tablespoons of olive oil.

IMG_0237 IMG_0254

10. Place two chicken breasts in the skillet at one time. Cook about four minutes per each side, or until golden brown. (I also added other seasonings here like garlic powder for added taste. Yummy!!)

IMG_0250 IMG_0251

11. When golden brown, place the two chicken breasts into your oven pan. Wipe any residue from the skillet, then add your last two tablespoons of olive oil to your skillet. Repeat the same procedure above with the remaining chicken breasts.

12. When all chicken breasts are on the oven sheet, place the chicken in the oven for 15 minutes, or until cooked thoroughly (minimum internal temperature of 165 degrees).

IMG_0257

After the timer beeps, your meal is ready!! How easy was that?

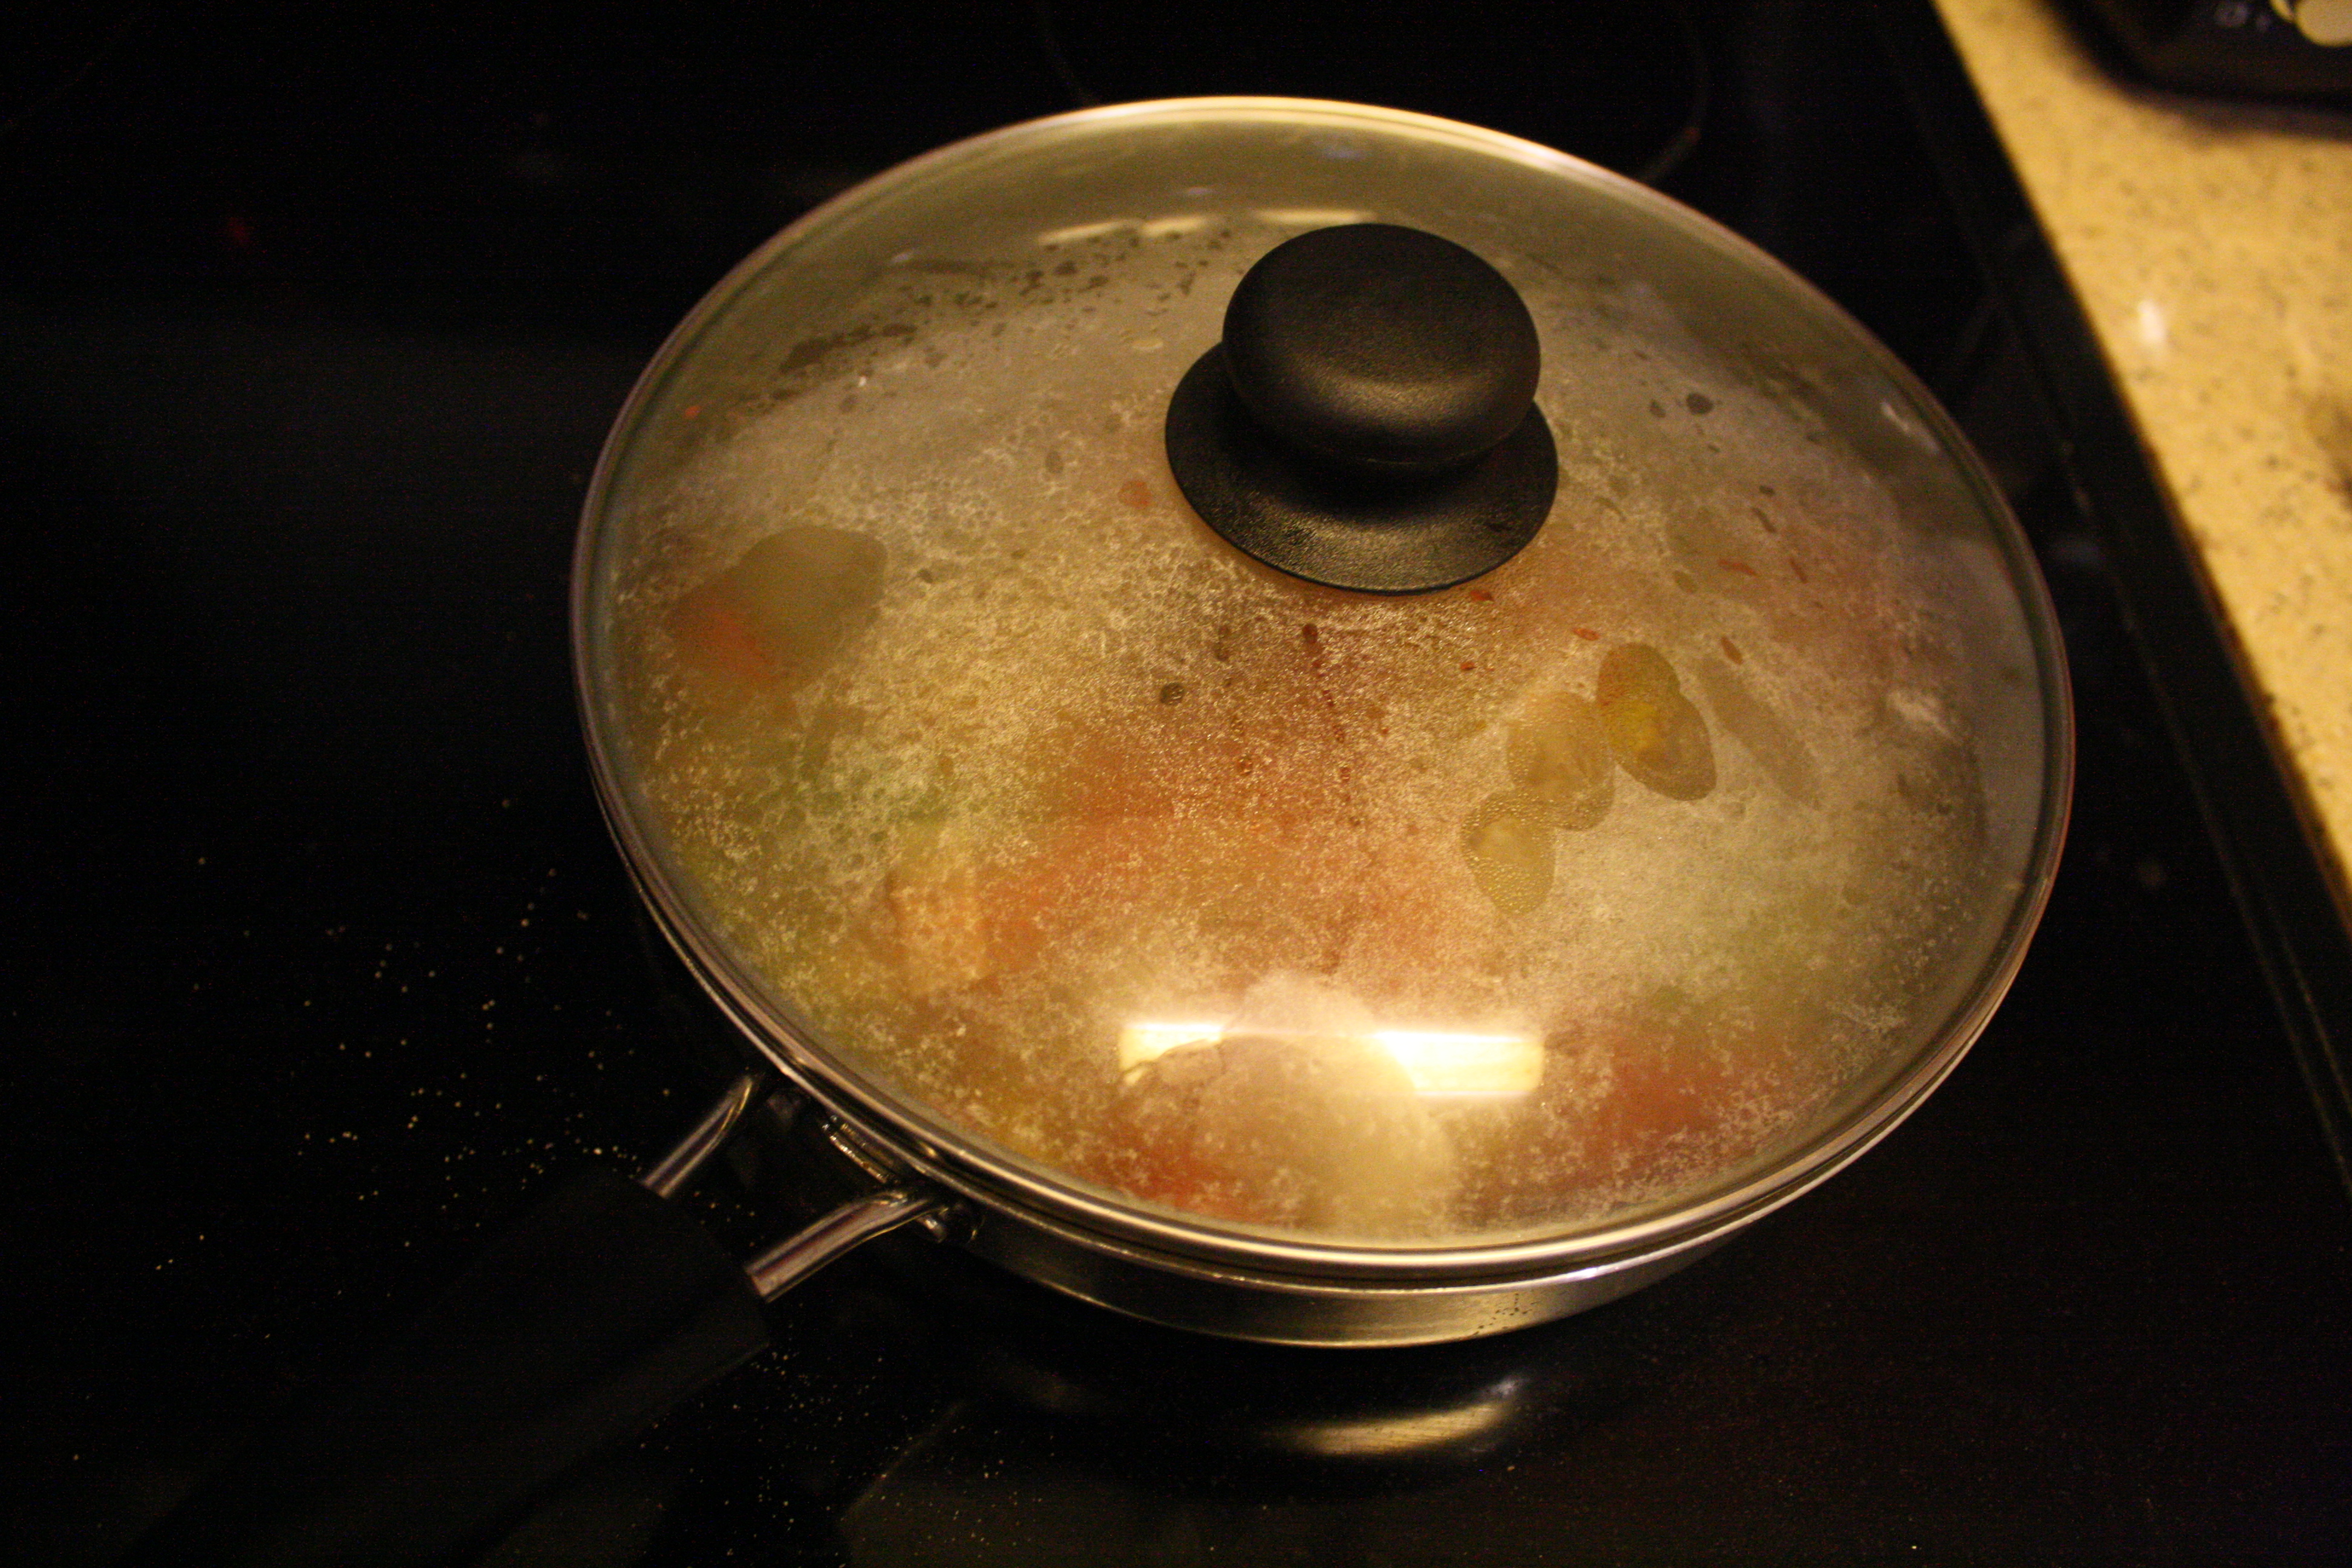
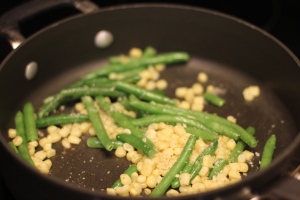
For my dinner, I whipped up some quick frozen vegetables I had lying around as a side for my meal. My corn was from Trader Joe’s, and green beans were from Kroger. I wiped down my skillet one last time, added one tsp of olive oil. I let these cook for about 7-8 minutes with the pan’s top on. I added garlic seasoning and fresh pepper, as well as a couple pinches of the bread crumbs to bring both tastes of the dish together.

IMG_0259

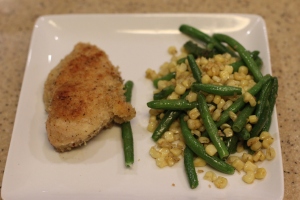
At the end this is the easy, delicious meal I got to enjoy, guilt-free.

IMG_0261

Hope you have enjoyed this recipe and gotten a break from your normal boring chicken routine!  Here are some other great chicken recipes I’ve found from Food and Wine, the Food Network & Kraft. Comment below on your thoughts, and let me know what chicken recipes & sides you or your family uses to liven up dinner time!

Gluten-free cookies make for a happy tummy

chocolate chip cookieap012 Use please

For all the chocolate lovers,

For my first recipe review I made one of my favorite treats as a pick- me-up from a long week! I call them “Ooey Gooey” gluten-free chocolate chip cookies. Some of you will see the gluten-free and leave this recipe in hopes of a tastier recipe. Gluten free, however, should not worry you because I’ve found that these cookies may be even more delightful than the already delicious treat. These cookies just leave out some grains that could be harmful on your body. Take a look at the recipe from the food network! This recipe comes out beautifully. The cookies are soft, chewy and melt on your tongue. Enjoy this recipe and please let me know how much you love them!! Props to the Food Network for the awesome recipe.

INGREDIENTS

  • 8 ounces unsalted butter
  • 11 ounces brown rice flour, approximately 2 cups
  • 1 1/4 ounces cornstarch, approximately 1/4 cup
  • 1/2 -ounce tapioca flour, approximately 2 tablespoons
  • 1 teaspoon xanthan gum
  • 1 teaspoon kosher salt
  • 1 teaspoon baking soda
  • 2 ounces sugar, approximately 1/4 cup
  • 10 ounces light brown sugar, approximately 1 1/4 cups
  • 1 whole egg
  • 1 egg yolk
  • 2 tablespoons whole milk
  • 1 1/2 teaspoons vanilla extract
  • 12 ounces semisweet chocolate chips
Directions

Melt the butter in a heavy-bottom medium saucepan over low heat. Once melted, pour into the bowl of a stand mixer. In a medium bowl, sift together the rice flour, cornstarch, tapioca flour, xantham gum, salt and baking soda. Set aside. Add both of the sugars to the bowl with the butter and using the paddle attachment, cream together on medium speed for 1 minute. Add the whole egg, egg yolk, milk and vanilla extract and mix until well combined. Slowly incorporate the flour mixture until thoroughly combined. Add the chocolate chips and stir to combine. Chill the dough in the refrigerator until firm, approximately 1 hour. Preheat the oven to 375 degrees F. Shape the dough into 2-ounce balls and place on parchment-lined baking sheets, 6 cookies per sheet. Bake for 14 minutes, rotating the pans after 7 minutes for even baking. Remove from the oven and cool the cookies on the pans for 2 minutes.

Cookie_monsters_-_vegan_chocolate_chip_cookies

Move the cookies to a wire rack and cool completely. Store cooked cookies in an airtight container